Documentation
Frank Lloyd Wright’s Broadacre City
Step 1: Preparing the model
Preparing the print file for the suburban house was the first step.
The house was modeled after a suburban house plan found online.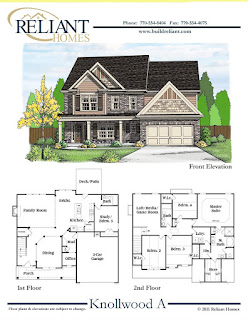

Using Rhino, I modeled a simple but indicative model of the house. The overall shape of the house was modeled without the windows and doors as the scale of 1:200 was too small to replicate a more accurate version.

The next step was to prepare the laser cut files. This was done in AutoCad and imported into Rhino.
Step 2: Cutting and Printing
The model uses 6mm poplar ply for its laser cut portions and a regular filament was used to print the House.
To achieve a seamless edge on the communal planes, I marked out 45 degree angles on the top of the 6mm poplar ply and created a mitre joint.

The 3D print took approximately 14 hours to complete.

Step 3: Tidying up
With laser cutting, the poplar ply was covered with burn marks. The burn marks had to be sanded down to achieve a better quality final product.

I sanded down the poplar ply with a 240 grit sand paper to achieve a smooth surface without burn marks.

Finally, the excess filament from the base of the 3D print had to be trim off.
Step 4: Assembling
The model is then finally glued together, using PVA glue for the wood veneers and poplar plywood and UHU glue for the 3D Print onto the base.
Final Product

Glenn Murcutt’s Walsh House
Step 1: Preparing the model
Consideration of the different materials required for the different components of the model was the first step. With majority of the model produced using laser cutting.
A 3D model of the house was done to better understand the different parts that were required.

The model was prepared in away to account the actual thickness of each material, with each wall modeled on its own instead of all the walls being as a single component. This was done to ensure the minimal errors while laser cutting.

Finally, flattening all the different components and getting them ready for laser cutting.

Step 2: Cutting and Casting
The laser cutting was done within one one hour session, and most of the parts were ready for assembling.

The next step was to prepare the mould for the floor slab. With the model being in a 1:100 Scale. This meant that the floor slab would be approximately 3mm thick. This meant that the slab would be too thin and would be damaged easily. I decided to instead increase the thickness of the mould, and have the slab concealed under the contours.
The mould was prepared with form ply with the edges mitred using a bandsaw to prevent the edge of the exposed form ply from creating a mark on the slab.
Using an outline of the base that I created from laser cutting. I used double sided tape to take on the form ply onto a form ply base to create a mould.

Finally, using hydrocal, pouring the it into the mould and waited for it to dry.


The casting took about 5 hours to dry entirely.


The mould was easy to remove as I only used double sided tape to connect it onto the form ply base.

Step 3: Tidying up
Again with laser cutting, burnt marks was left all over the basswood. This meant that the material had to be sanded down to achieve a higher quality end product.


Step 4: Assembling
The model was then stacked up to ensure that no mistakes were made from laser cutting before gluing them together.


Once everything was ready. The model was assembled using PVA glue for basswood to basswood connections and UHU glue for everything else.


To ensure that the base was strong enough, extra reinforcements from left over basswood was cut.

Final Product

Josef Albers’ Bauhaus Nesting Tables
Step 1: Preparing the Model
The model was first visualized using Sketchup. This was to understand the basic assembly of every part of the model before beginning to minimize mistakes.

The wood was then sourced from bunnings since the school is unable to provide such large pieces of wood.

Step 2: Cutting
The model was than brought to the workshop to be cut. Producing mitre joints for the top portion of the table and a regular butt joint for the bottom. Along with form ply that was used for the sides of the table. With the help of Heather in the workshop, the table legs and form ply was cut to the appropriate dimensions.

Step 3: Assembling.
The parts were placed together to ensure that the dimensions were correct and all parts were present.
Once confirmed, I started using the domino machine to create domino connections between the table legs. This was achieved using masking tape on the edges of both pieces of wood that required a connection, using a set square (or a 45 degree angle for mitre joints), to mark a straight line across both pieces of wood. The domino machine was then set over the material, aligning the mark on the masking tape with the indicated mark on the domino machine to create the domino drill.


This was repeated with every connection.
The connection on the form ply was slightly different. To ensure that the table top was flushed with the sides, the thickness of the table top (6mm) was accounted for and different heights were set on the domino machine for both the radiator pine and the form ply. With the radiator pine at 16 mm, and the form ply at 10mm.

Finally, using PVA glue on both ends of the domino and onto the surface of the wood, the legs are glued and assembled together.

They were left clamped overnight to ensure a strong enough bond.

This was repeated with all four tables.

Finally, the table top was made by cutting 3mm poplar ply, along with laser cutting 3mm tinted acrylic to replicate the coloured finish.


Before attaching the table top, the masking tapes were removed, and the table tops along with the legs were sanded down to achieve a higher quality outcome.
Poplar Ply was glued down using PVA wood glue and the sides of the acrylic was connected with minimal and carefully applied UHU glue to avoid spillage.
Final Product


Comments
Post a Comment